
In this article, you will learn how to configure category hierarchies, upload and manage images, maintain assortments, import product data via CSV, and publish validated changes so updates are displayed correctly in the product catalogue.
Access to this space is restricted to users with the Manufacturer Admin role. (The alternative role for manufacturers is Local Admin, which only permits the modification of requests.)
STEP 1
Sign in using your Administrator credentials.
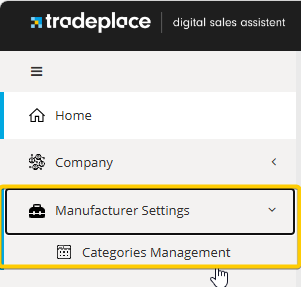
STEP 2
From the main navigation, go to the Categories Management tab.
STEP 3
Select the desired Country, brand, supplierID and Language to open the editor.

STEP 4
Create the required categories. You can define up to five levels of subcategories. However, once a product page has been created under a category, no additional subcategories can be added to that branch.
Each category can be highlighted, and images can be uploaded (maximum file size 10 MB, recommended aspect ratio 2:1 (400x200 pixel - landscape).
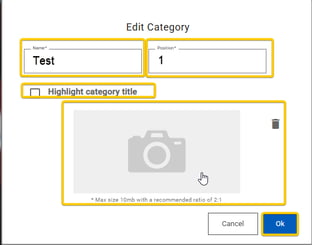
Category creation example:
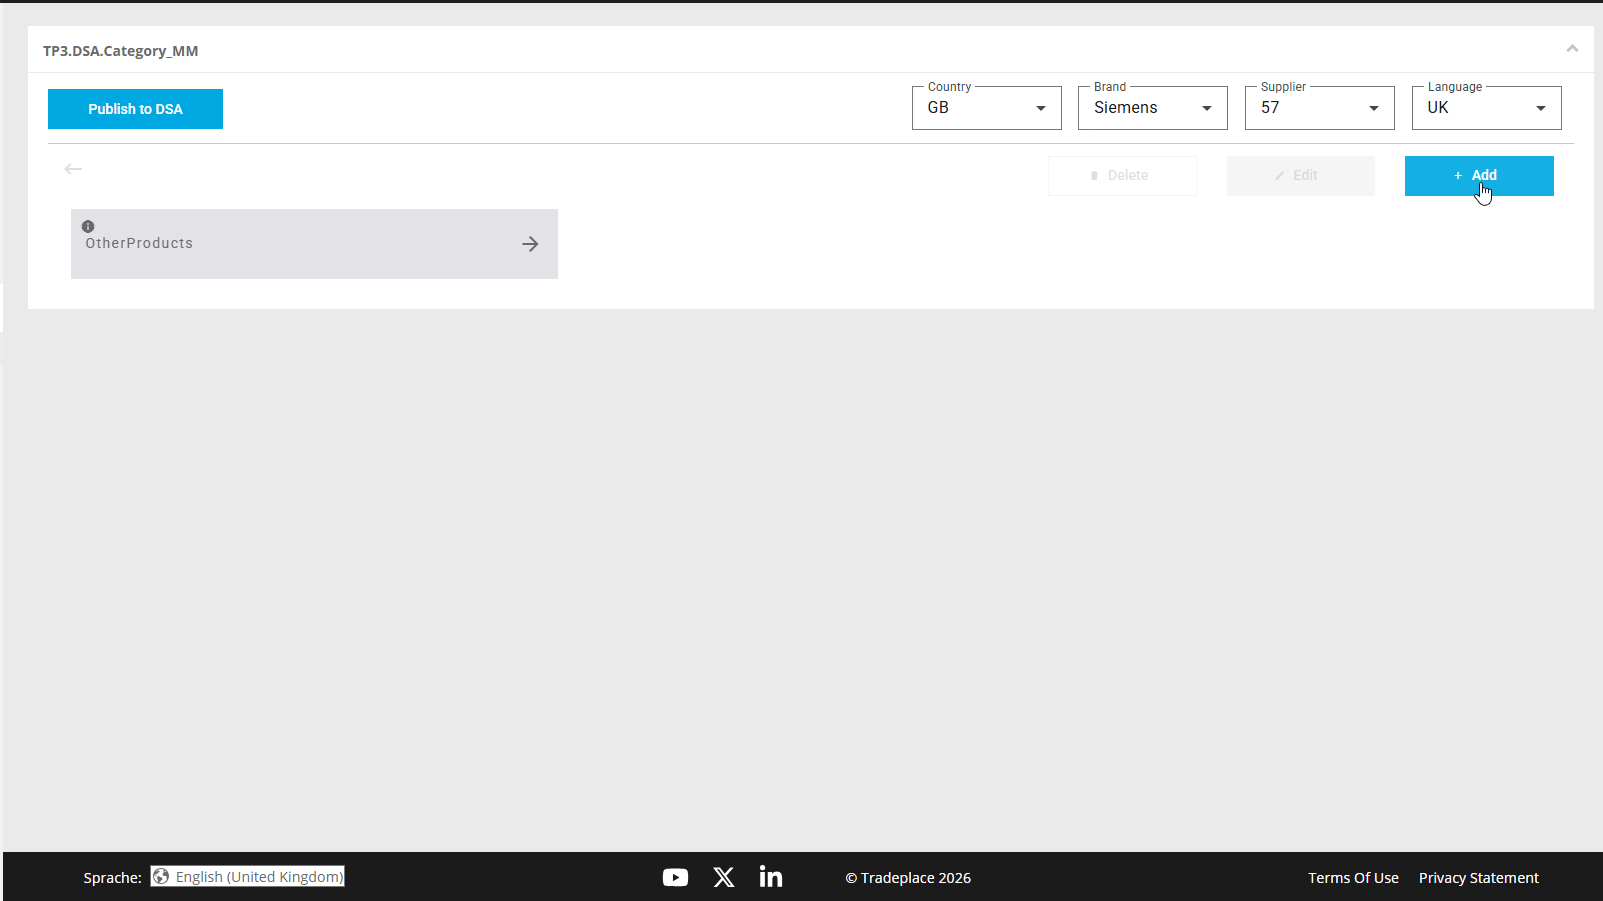
The "Other Products" category is a special category intended for products that should not be listed under any standard category, but still need to be visible in search results.
STEP 5
After your categories are set up, create the required product pages. Products can be added manually or imported via CSV. Once the file / products are uploaded, save the product list. (this list can also be exported if needed)
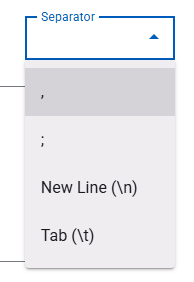
When importing manually, ensure you specify which separator is used:


STEP 6
When you are satisfied with your categories and product pages, publish your changes by clicking on the Publish option so they become visible in the product catalogue.
